Part 1 of 4:
The Dress & Pelisse
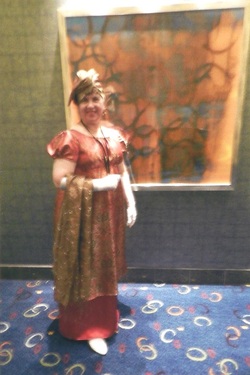
My plans for this year (2018) include going to both the Romantic Times Booklovers Convention in Reno and the Romance Writers of America conference in Denver (including the 1-day Beau Monde Mini-Conference featuring all things Regency)–not just one, but two occasions to wear historical costume. So I decided at the beginning of the year to create a Regency costume—not just a full-length, high-waisted gown, but the whole shebang. This post is the first of a 4-part series on the construction of that costume, its accessories, and, finally, the results as seen in the professional photo shoot to which I treated myself after the three-month-long project was complete.
Having decided to make the costume, I went shopping right after New Year’s for a pattern and fabric. Unfortunately, there aren’t many Regency patterns available at present, as these tend to be directly proportional to the number of Jane Austen adaptations on the big screen at any given time; as of this writing, 18th-century patterns tend to be more prominent, thanks to Outlander and Poldark.
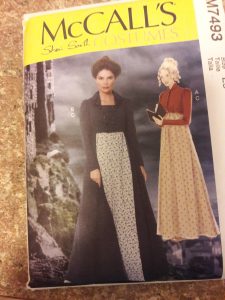
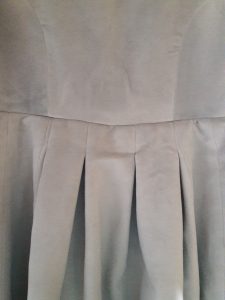
I did find a few, though, and settled on McCalls #7493. I liked the fact that it offered, in addition to the aforementioned full-length, high-waisted gown, either a short spencer with a pleated peplum in the back or a full-length pelisse with a cutaway front, pleats in the back, and a double-breasted bodice with a draped collar in a contrasting fabric. Both had two-piece sleeves, and both were fully lined. In other words, this was not a pattern for beginners. But I’ve been sewing since I was nine years old. Few patterns have the power to defeat me—and I’m rather a snob about that. So this fairly complex pattern was right up my alley.
Now that I had the pattern, it was time to shop for fabrics. In my opinion, fabric stores have gone downhill in recent years, with more focus on crafters (especially quilters) than on people who sew, you know, actual clothes. Thanks to all those quilters, I knew it would be no problem to find a cotton print that looked reasonably accurate for the period; fabric for the pelisse (I’d decided to go for the pelisse rather than the spencer, because harder. Yeah, I’m a snob that way.) was likely to prove the greater challenge, so I concentrated on that first. I looked at both Walmart and Joann’s Fabrics (my only local options) for a coat-weight fabric that wasn’t an anachronistic polyester or an obvious poly blend, but without success. In desperation, I went to the back corner of Joann’s, where the upholstery fabrics were kept on enormous cardboard rolls against the wall. And there I found a dove-gray fabric with a slight nap. It was certainly coat weight—in fact, my first thought was that it weighed a ton—but upon reflection, I decided it was no heavier than denim, and lighter than some denims I’ve worked with. For the lining, I bought a length of gray broadcloth that would conceal the wrong side of the fabric while keeping the added weight to a minimum. The upholstery department also yielded another treasure: a relatively lightweight brocade whose color would match the body of the pelisse while the weave provided a contrast.
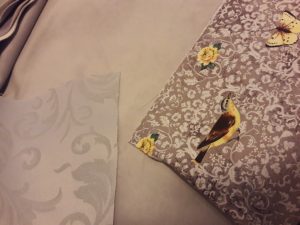
Clockwise from top left: the gray pelisse fabric; the cotton print I chose for the gown; the silver-gray brocade I used for the contrasting collar of the pelisse.
Now, for the gown. As I had expected, there was no shortage of cotton prints. I’m not generally a fan of sweet little floral patterns, and given that I’m *ahem* past the first blush of youth, I wouldn’t be presenting myself as a young lady in her first Season, but a fashionable society matron. Still, I wanted something that looked reasonably accurate to the period. I finally found a somewhat bolder print, a gray-on-gray pattern punctuated by yellow-and-brown birds and butterflies along with yellow roses and green leaves. This would not only match my pelisse, but also give me additional colors for accessorizing without looking like I was in half-mourning.
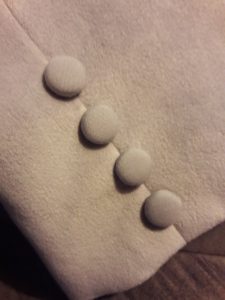
True to the fashions of the period, my pattern contained no zippers or snaps; the pelisse buttoned in the front, and the gown buttoned in the back. (This also meant that I would be unable to get in and out of the dress without assistance; I made a mental note to make sure to have plans in place before the event for someone to help me into and out of it.) I knew that fabric-covered buttons were popular during the Regency, so I decided to make covered buttons. Alas, both the gown and pelisse called for ½-inch buttons, and I couldn’t find covered-button forms in that size locally. Thank goodness for Amazon! I was able to buy a button-making kit in the correct size, plus a bag of additional button forms—a good thing, too, as I would need eighteen buttons for the pelisse alone (four for each sleeve and ten for the double-breasted bodice), plus another four for the gown. Then, too, there was that pelisse fabric. I suspected it would be too thick for buttons that small, and when my button kit arrived, one practice attempt was enough to prove that I was right. I decided to use remnants of the gray broadcloth I’d used for the pelisse lining. The color was so near a match that they looked identical, and the lighter weight was much better suited to the purpose.
As for the gown, I ended up making a couple of small additions after it was complete, one to the bodice and another to the skirt. It was important for the bodice to fit closely, and since I’ve always had a small bustline relative to the rest of me, this meant placing the buttons considerably farther inside than the markings indicated on the pattern. I was afraid this would make it look somewhat off-centered from the back, so I added a second row of buttons on the outside of the bodice, a couple of inches from the buttonholes. They don’t really do anything—that is, there are no corresponding buttonholes—but they do give it a sense of symmetry and, as my proofreader and fellow seamstress pointed out, they reflect the double-breasted construction of the pelisse. This brought my total button count to twenty-six, so I was especially glad to have all those extras.
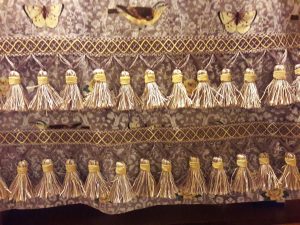
Finally, when I stumbled across a braided trim with tassels in exactly the same color combinations as my dress fabric, I couldn’t resist buying enough to put a double row around the bottom of the skirt, reflecting the ornamented hemlines characteristic of the late Regency period.
In Part 2, I’ll be sharing what was, for me, the most challenging part of the costume: the bonnet.
